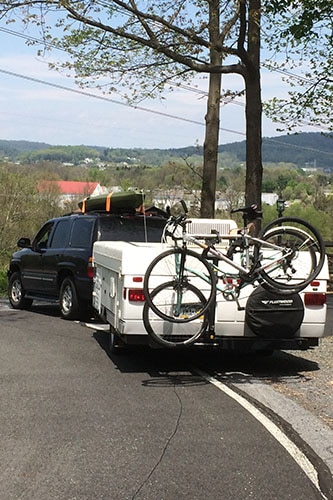
 One of our favorite things to do when we camp is to go biking. Whether it’s just around the campground, or finding nearby bike trails to explore, we put a high priority on bringing our bikes with us. Our 2005 Fleetwood Bayside has rails built into the roof, but since the former owners had issues with water infiltration (that turned out to be a bad AC gasket, which we repaired), we didn’t want to take any chances with putting more stress on the camper roof. But we really wanted to be able to use a bike rack on our pop up camper.
The bike rack we have, similar to this one, fits into a standard 2-inch hitch receiver. At first we tried a dual receiver that we got at Walmart, intending it to allow us to carry the bikes between the truck and the camper. But when we tried it, there was not enough room between the bottom of the bike rack and the top of the hitch ball for us to attach the trailer. So we tried a higher dual receiver. Still no dice.
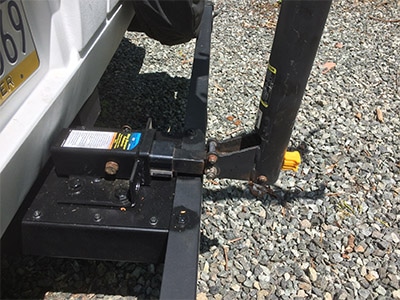
Our friend Randy is an engineer and loves to problem-solve. We mentioned our dilemma to him and his mind set to work. We knew that the hollow c-channel bumper wasn’t strong enough on its own to support a bike rack, but Randy came up with a fix that is super strong and works great. Here’s a close up of the final product.

Final DIY bike rack hitch for pop up
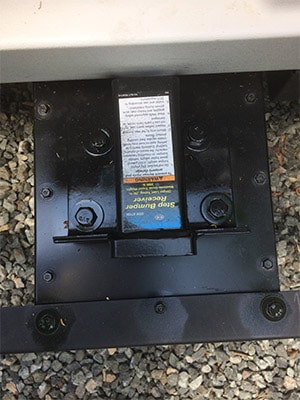
To be fair, Randy’s one of those guys who has lots of bits and pieces of former projects lying around. He had some pieces of steel channel (not sure if it’s C channel, U channel, or MC channel) and cut three pieces, two of which were the length of the distance between the hollow pop up bumper and the trailer frame. The third piece was approximately the same size. He cut 45-degree angles and had a friend with a MIG welder join them, creating a sturdy steel “U” that could be bolted to the trailer: the flat side got bolted to the trailer frame and the two tops of the “u” were bolted into the hollow bumper. Next, a square piece of steel was bolted to the top of the structure. This would be the support for the final piece, the step bumper hitch receiver.
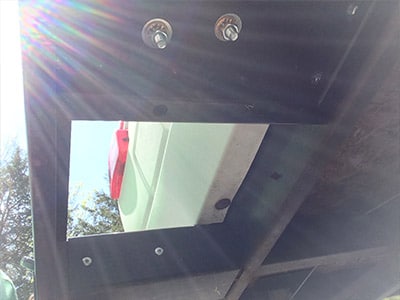
Underside of bike hitch – top of image
I watched with amazement as Randy used his battery-powered Makita drill to drill through the bumper, the frame of the pop up, and the steel plate. I asked if he was using special bits, and he said they were inexpensive bits like these.
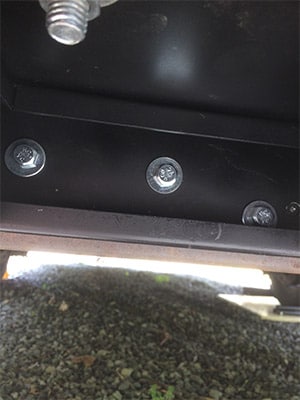
Bike hitch bolted on to trailer
The key to the strength of this DIY bike rack is definitely the steel channel used. Because the steel is curved, it adds incredible strength to the resulting support, and can easily handle the weight of multiple bikes. To demonstrate that, we each took turns standing on top of the hitch receiver, and clearly nothing was budging.
You may notice that there are black shiny circles around the bolts: Randy didn’t want to leave the bolts in their natural silver state. He grabbed a black spray paint and sprayed each of the bolts to blend in to the overall black vibe of the new hitch receiver.
At that point all that was left to do was to place the bike rack in the receiver, and mount our bikes. Since my bike is a “comfort bike” and doesn’t easily lend itself to loading on a bike rack, we first attach our Saris cross bar. Then it loads on in a snap.
We’ve been super happy with our DIY bike rack for our pop up trailer. One thing we have noticed is that, since it is at the far end of the trailer, it bounces a fair amount. If you think about it, it’s like the tail end of a whip, or sitting at the back of the bus – it gets the most amount of bounce when we go over bumps. We counteract that by adding some ratchet straps. We wrap them around the bikes and through the holes on the side of the receiver or around the bumper.
We are so grateful for Randy’s creative DIY fix so we can use our bike rack with our pop up. While you might not have the exact materials he used, we hope this example helps you come up with your own solution. Below are some other images that may help demonstrate how the final DIY bike rack for our pop up camper turned out.
Top view of bike rack hitch receiver
Side view of bike rack hitch receiver
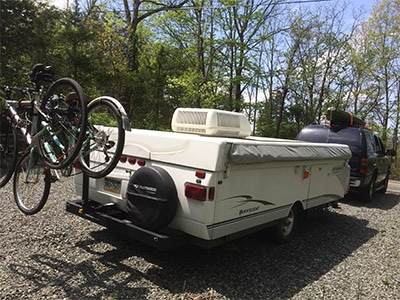
Rear view of bike rack on pop up
Leave A Comment