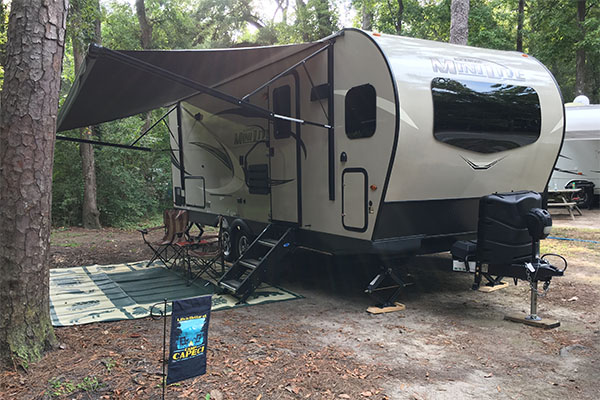
Our RV’s maiden voyage to Myrtle Beach State Park
If you are like me, you don’t relish dumping your RV tanks. This past year was our first with our new travel trailer. After deciding we were getting a little long in the tooth to enjoy the set up and tear down of our beloved pop up, Buddy, we sold it to another family and excitedly bought our current RV: a 2020 Rockwood Micro Lite 2506s. We’re still working on the nickname. Woody? Rocky? We’ve not decided yet.
Anyway, after watching a bunch of YouTube videos and buying the requisite items (like a sewer hose and a clean out hose), we started camping with our new RV. The first few times, we were thrilled to be the only ones at the dump station on the way out. No people waiting in line for the newbies to get those holding tanks emptied.
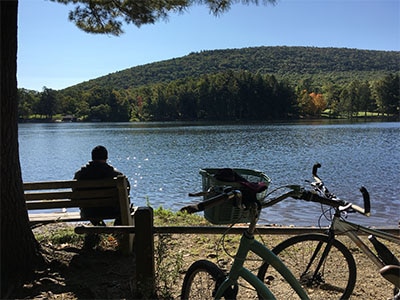
Enjoying Cowan’s Gap State Park
The Stumbling Blocks
There were two parts of the process that added time and effort for us to get dumping accomplished: removing the sewer caps (we have a black water tank and 2 gray water tanks for a total of 2 sewer caps), and getting the sewer hose out of the bumper.
The way we’ve divvied up the process is that my husband pulls up, lining us up mid-way between the two tank valves on the trailer. Then he sets up the orange clean out hose to rinse the black tank from the special port at the back of the trailer. Meanwhile I jump out, grab my gloves, and take the stopper out of the back bumper where we keep the sewer hose (with its attached clear swivel fitting), then go over and start removing the first sewer cap and attaching the sewer hose. Sounds easy, right?
Here’s the problem(s): first, while the hose fits into the trailer’s bumper nicely, getting the hose out is another story. It fits so snuggly that its basically wedged in there. I would stand there, trying to get my fingers around the end to pull it out, and sometimes had to resort to using a wire or thin piece of metal to try to hook it enough to get it out of the bumper. This was my first source of frustration. Next, when I came over to take off the sewer tank caps, they were too tight for me to unhook. I’d end up asking my husband to do it for me. And I’m not a weakling, really.
So I decided this year would be different – I was going to solve these two impediments to dumping the RV’s tanks. After some research, I found what I was looking for: a way to make dumping the RV tanks easier.
The Solutions
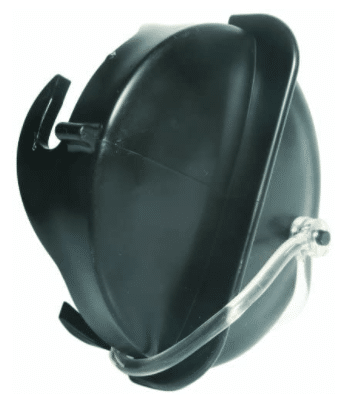
Pulling the magnetic bumper cap off draws out the hose
I knew then and there that I would track that item down and buy it. Turns out Camco makes a magnetic bumper cap that fits a standard travel trailer bumper. Inside the cap are lugs that match the bayonet-style sewer hose fitting. Just turn the end of the sewer hose to connect to the cap, and then tuck it into the bumper. When you pull the cap off, the sewer hose meekly follows. And to sweeten the deal, both the magnetic cap and the cap for the other end of the bumper (included) have air holes, allowing the “perfume” from the hose to air itself out as you drive. No more pungent whiff when opening the bumper cap. Problem one solved!
 The second problem wasn’t going to be solved by me beginning some sort of strengthening routine. Again, after some research, I located another Camco product: a type of sewer cap that has built-in raised bar for easier gripping. Aha! This middle-age woman with average grip strength can now get enough leverage to open this cap without relying on her partner to open it.
Before I went through with ordering the 2 sewer caps, I read somewhere about using a standard garden hose to release some of your gray water out away from your RV to keep from maxing out your gray tank (only where releasing gray water is not prohibited, of course). This idea fascinated me. As mentioned we have 2 gray tanks: one that fills from the shower and bathroom sink water, which is combined with the black tank sewer outlet; and one that is filled from the kitchen sink. Since my husband likes cooking and we enjoy using “real” (that is non-disposable) dishes that require washing, this is the gray tank that fills the fastest.
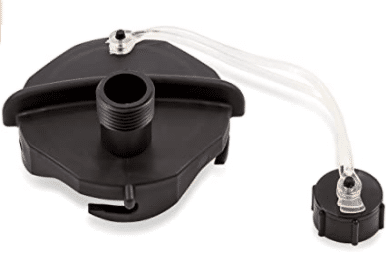 As I was getting ready to place my sewer cap order, I found Camco makes the same raised-bar-type cap but with a standard hose connection. So I decided to get this cap with the hose adapter for the kitchen gray tank in case we are in a position to try releasing a bit of the gray water at some point.
Conclusion
Both of these mods to our camper were inexpensive and super easy to install. The result: a streamlined RV dumping process. It’s still never going to be our favorite part of camping, but with these small changes, dumping our RV tanks is certainly easier and faster!
Leave A Comment